Propagating Succulents

What is Propagation?

THE DICTIONARY SAYS: Prŏp″ə-gā′shən Multiplication or increase, as by natural reproduction

Multiplication is an understatement when it comes to succulents!  Succulents are the rabbit of the plant family 😊, they reproduce quickly. And if you know how to separate them, you can create many more lovely plants, otherwise known as PROPAGATION!

When I started this page, I thought I could quickly put together a tutorial on how to propagate succulents, since it has become such a passion of mine. I had taken some great photos over the past decade or so, and wanted to share them with others and give some advice on what I’ve learned along the way. But as I started creating folders for each variety of succulent found in my saved photos, I realized this project was going to take me a lot longer than I thought.

First, with each new variety I had to research the name of the plant, which wasn’t an easy task. After hours and hours of research, and cutting and pasting pictures into folder after folder, I found that I actually had over 30 different types of succulents in my garden! And it was so interesting to see which of them were in the same family! Apparently there are 50-60 different succulent “families” and over 10,000 different types of succulents in the world. Who knew??

After finally getting all of my photos separated, I was ready to start showing off the variety of ways that succulent plants propagate themselves! To me, it was the reason I was so fascinated with succulents. I had no idea that a plant could drop a leaf and a new plant could reproduce right from that leaf! After gardening for decades with vegetables, and hundreds of house plants, I had never worked with succulents before, so it really was surprising to me.

The benefits of propagating succulents are unique to each person.  You may want to add on to your garden, use them to make gifts, or share them with friends and family.  All it will cost you is the price of some dirt, some containers and your time, love, and patience.  But be careful, working with these plants is addicting once you see the results!

My own addiction with succulents began shortly after I had relocated across the country, back home to California from Pennsylvania.  4 years before, we had left California for a temporary move to the east coast, and I had left all of my house plants behind.  I never purchased a house plant in the 4 years we were in PA, although we did have the best vegetable gardens of our lives while living there, I’m assuming it was because of the heat and humidity. 

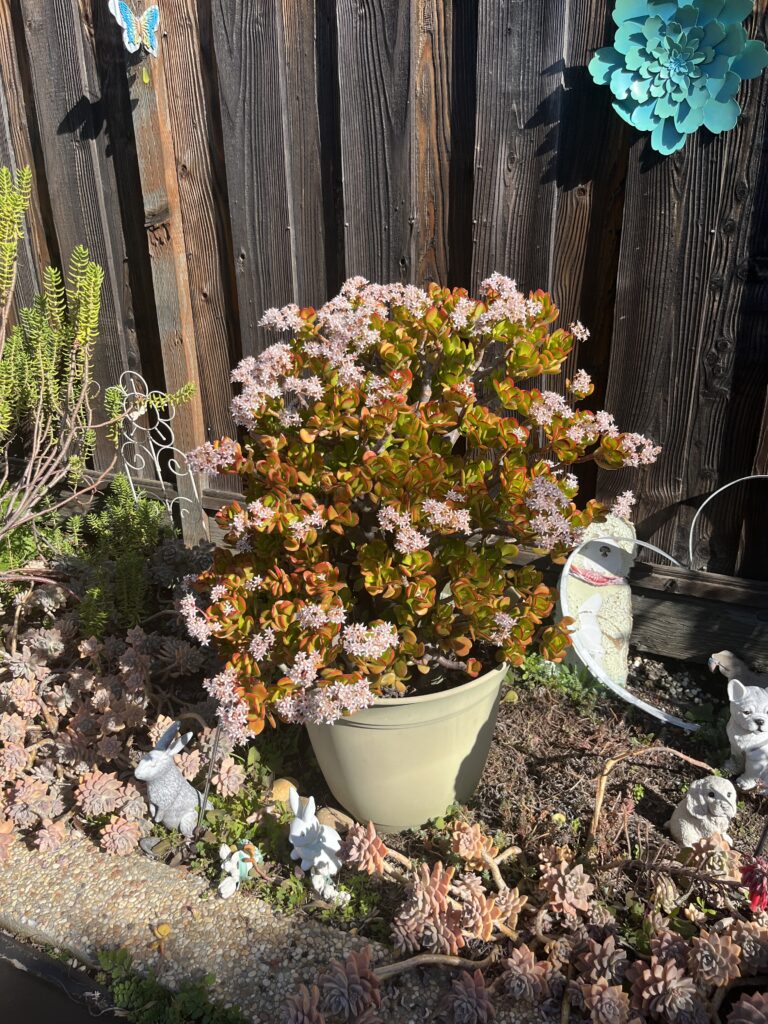
Upon moving back home to Northern California, I found a lonely jade plant at a garage sale for $2.00 and brought it home as my first new plant in this next phase of our lives.  It stood about 12” tall and to me it was beautiful.  It was sturdy and plump and over time I saw that with every season it took on a new look.  It bloomed beautiful pink flowers in the winter time!  Flowers in winter?  By spring the blooms are ready to fall off and the gorgeous green color of the plant continues into summer.  Here she is in mid-February 2023 at 10 years old:

Crassula Ovata – Hummel’s Sunset – Golden Jade – Pink Flowers

Anyway, back to my addiction, one day a coworker overheard me talking about my Jade plant.  A week or so later he brought me some clippings from the succulents in his mother’s garden.  He said “just put them in a pot of dirt and they’ll grow” which I didn’t understand…where were the roots?  How could you just plant a clipping and get a new plant?  But he insisted so I planted them into some pots, and some into the ground, and my new fascination for succulents began to grow (no pun intended 😊).

A few months later this same coworker told me his mother was moving into a retirement home and was having a garage sale (I need to write a page about garage sales).  She was in her 90’s and had lived in her house for quite a while.  He snickered again about her succulents, so of course I wasn’t going to miss that garage sale!!  Once I got to her house, I understood what his snicker was all about.  I walked into her rather large backyard and everywhere my eyes could see were succulents.  In pots of every shape and size, in the ground, around a homemade pond, along every fence.  In varieties and sizes I’d never seen before.  It was incredible!  I had no clue how anyone could acquire so many plants.  It was beautiful and I was inspired. 

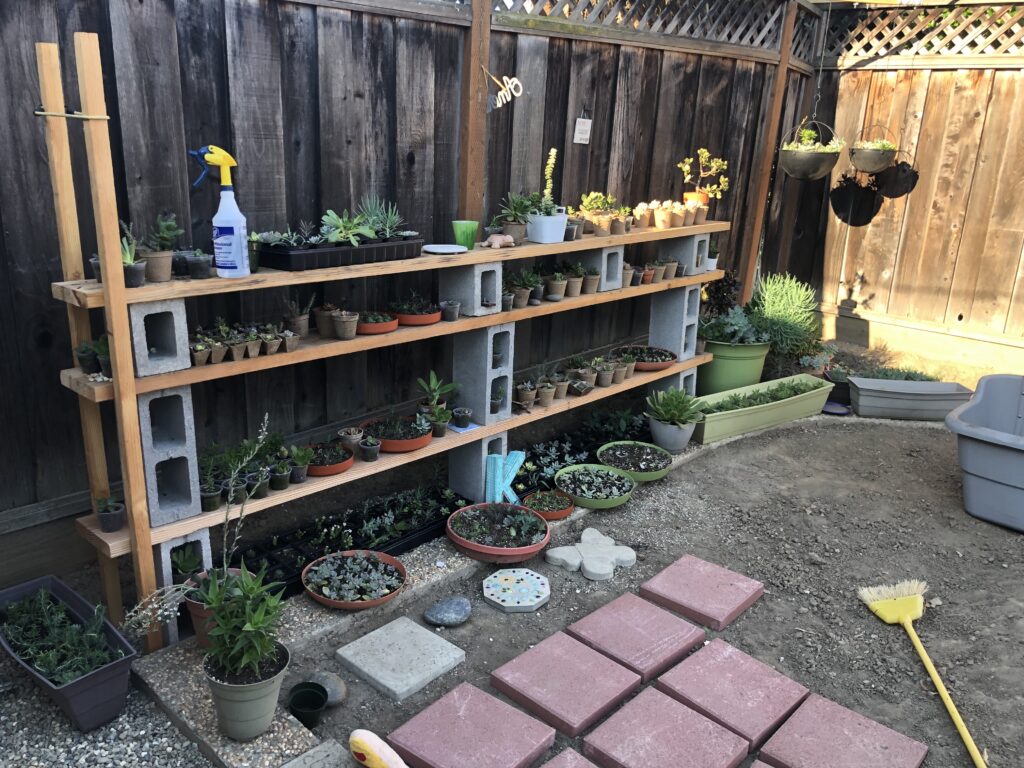
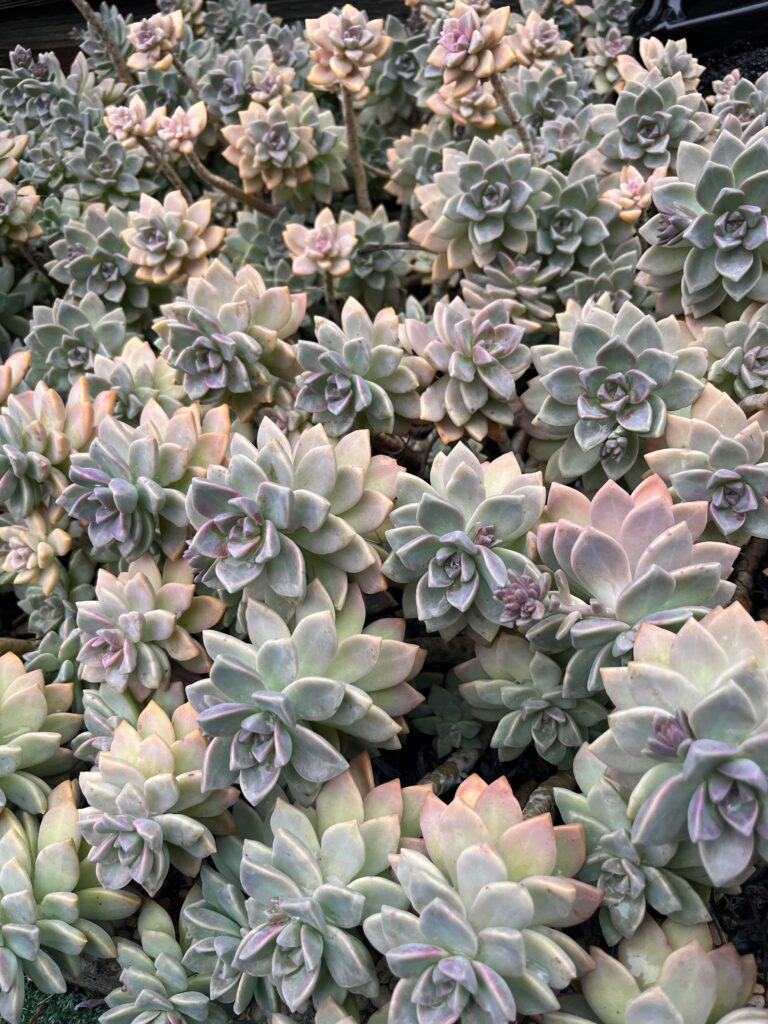
I purchased some of her plants, and with the ones I already had I was on my way.  Little did I know that 10 years later my backyard would resemble this yard, and inspire others!  All because of propagation, another thing I had no clue about.  It is the reason this lovely little old lady’s garden had grown to its size.  The succulents reproduce so quickly, and if you love plants, you want to save every single one of them.  Some would call it an obsession.  I call it love.  Love of nature, love of creation, love of nurturing, love of my plants.

Finally, let me tell you what I’ve learned about PROPAGATION!  Each plant reproduces in its own way, some will grow small plants on each stem that can be carefully removed and replanted; some will produce multiple baby off-shoots, which can be clipped and replanted; some you can just break off a branch and replant it, like the Jade plant pictured above; and some reproduce from a fallen leaf, which will start to grow its own roots, and develop into a new plant!  Once you get to know your plants, you will see for yourself how their reproductive system works.     

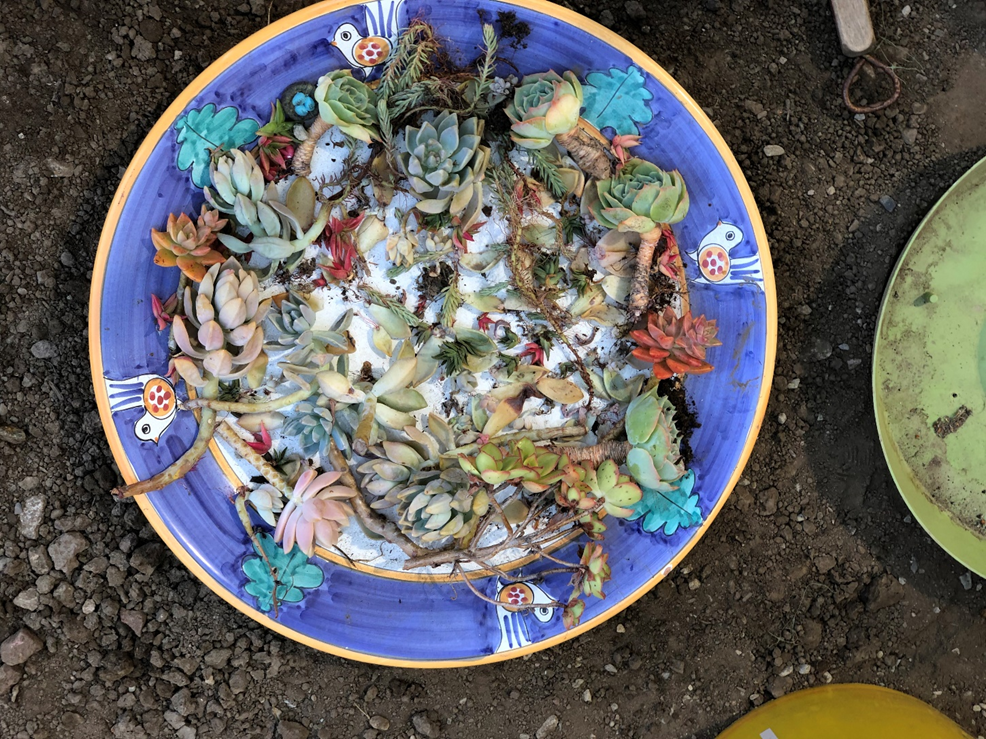
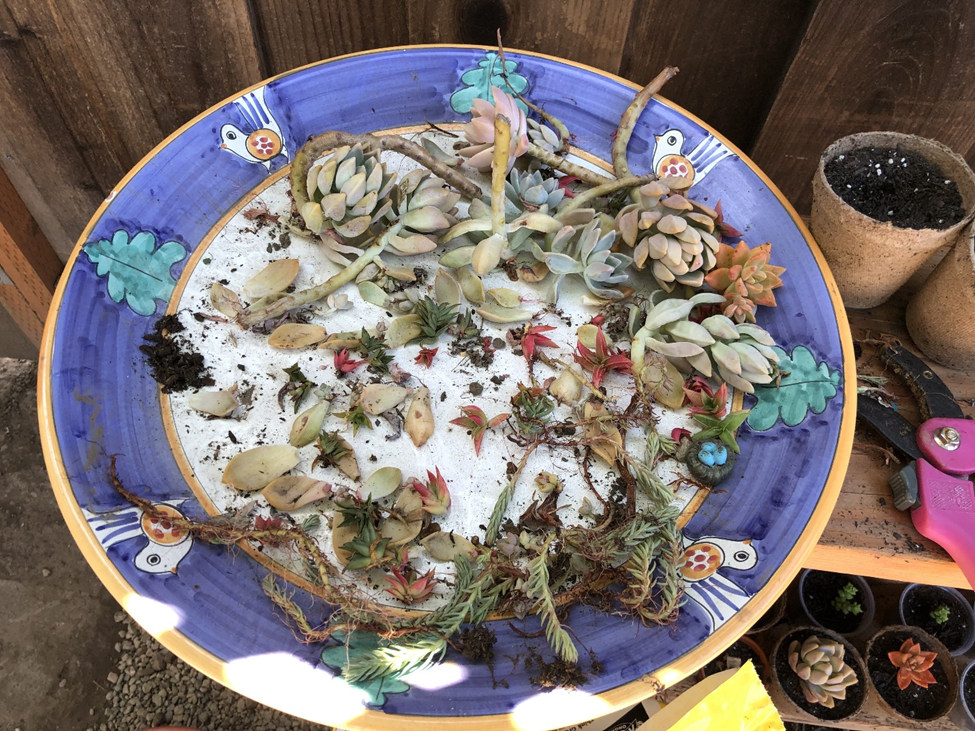
You can gather succulent babies and clippings when you are ready to propagate.  You can also collect them as you are weeding and cleaning up your garden.

As I collect the clippings and babies I find, I place them on a plate that I keep in my garden.  When I have time, I will plant them into pots or the ground.  In the meantime, they are perfectly happy to be on this plate for months, even years on end!  As long as I water them, they will grow strong on this plate, it’s crazy!!

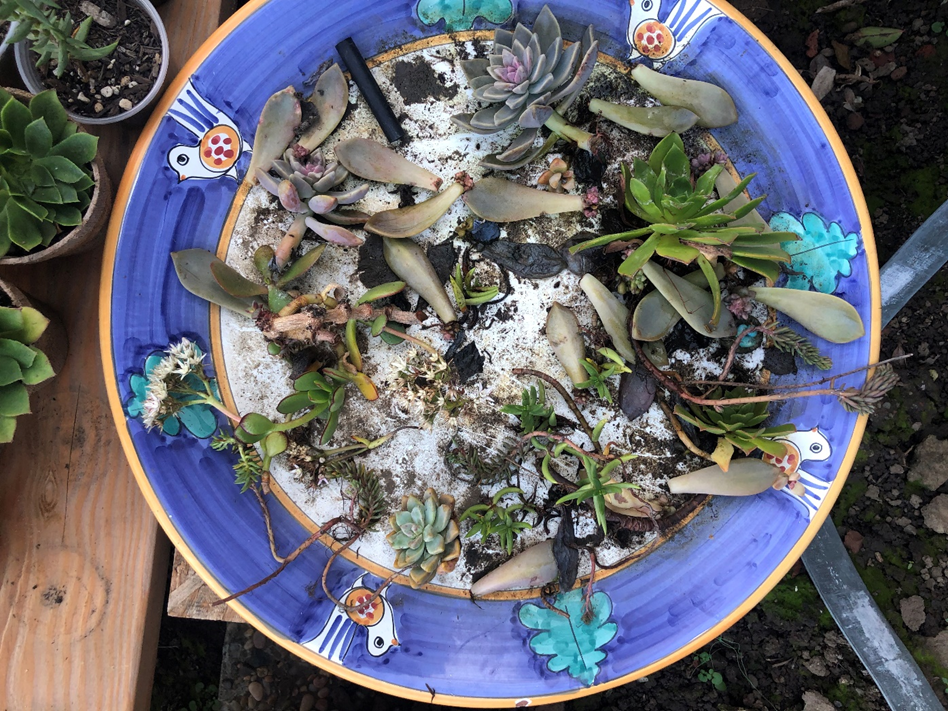
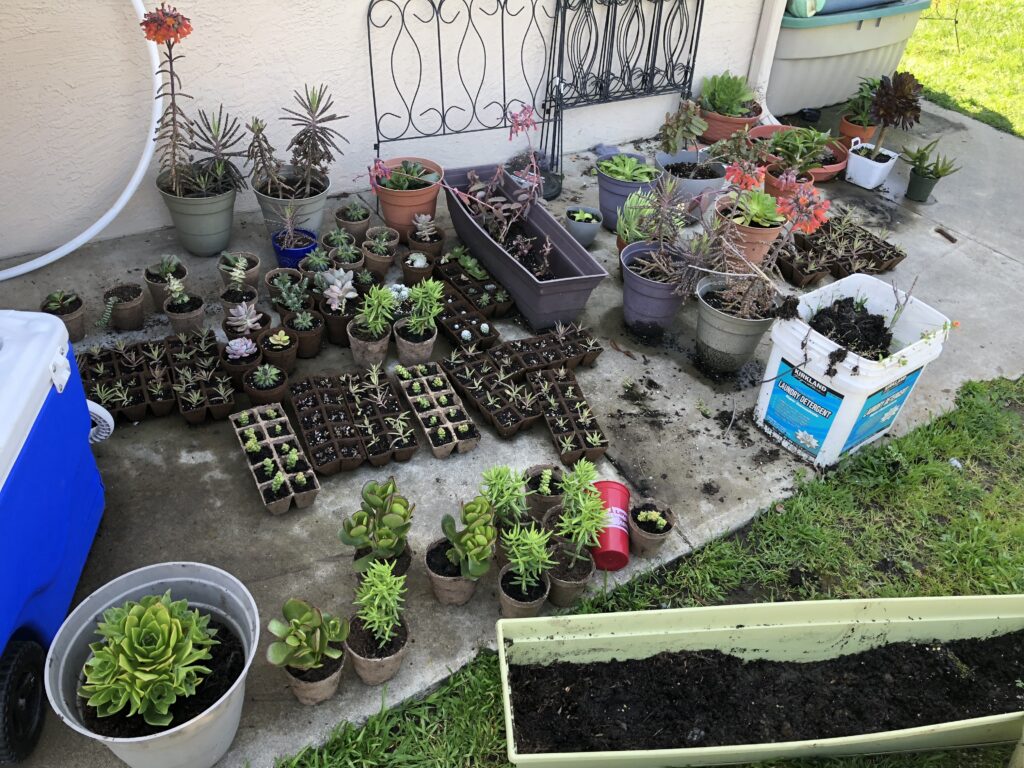
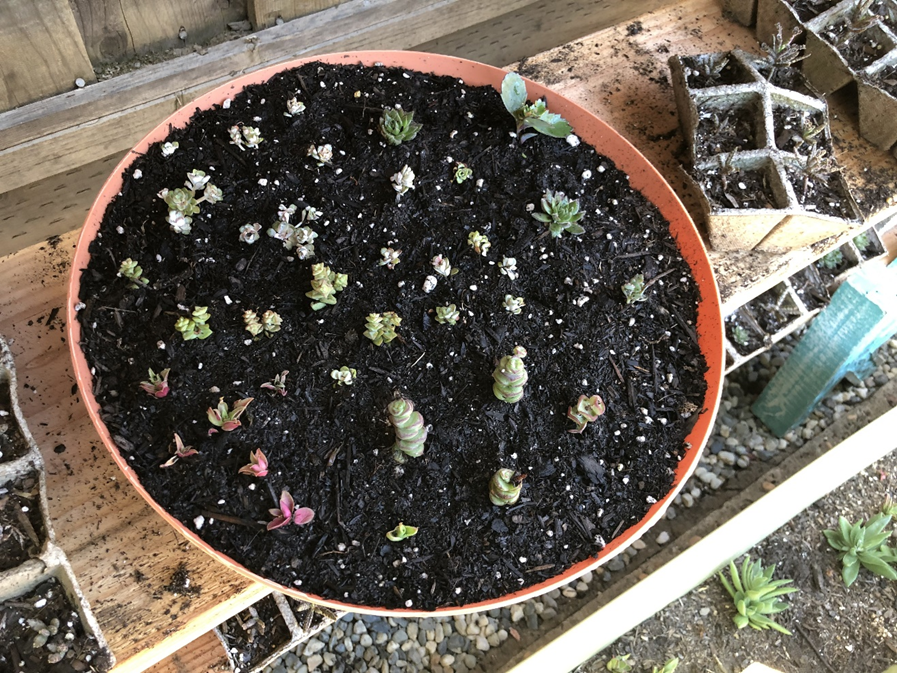
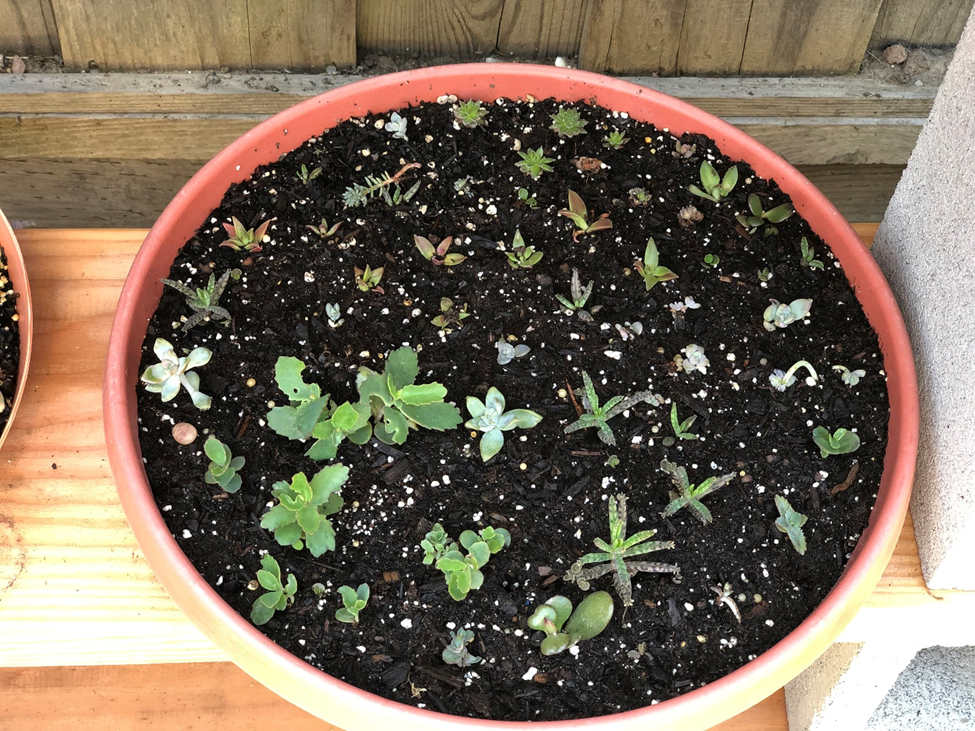
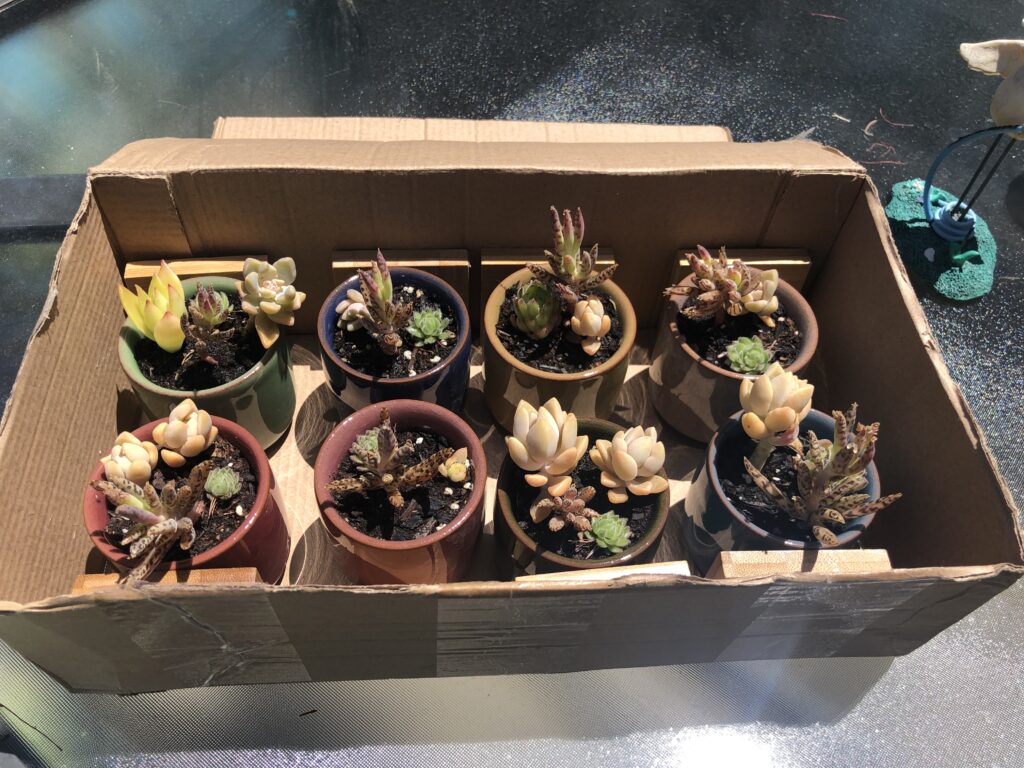
You can use any type of container as propagation pots. One of my favorites is to use the saucers from my outdoor plastic pots. I don’t use the saucers outdoors, because when watering the plants I like my outdoor pots to drain directly into the ground.  So, I found a better use for them!  I poke holes in them using an ice pick, then fill them with dirt, and place my babies into them until they are stronger.  Then I transfer them into a bigger pot or into the ground. 

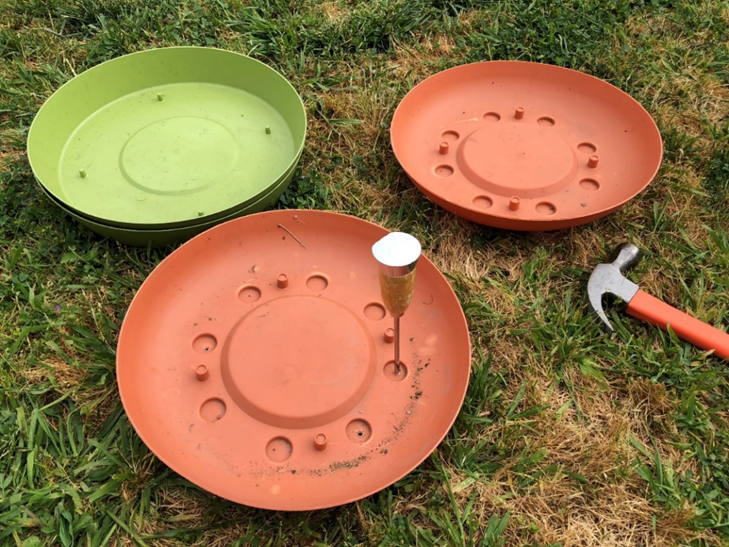
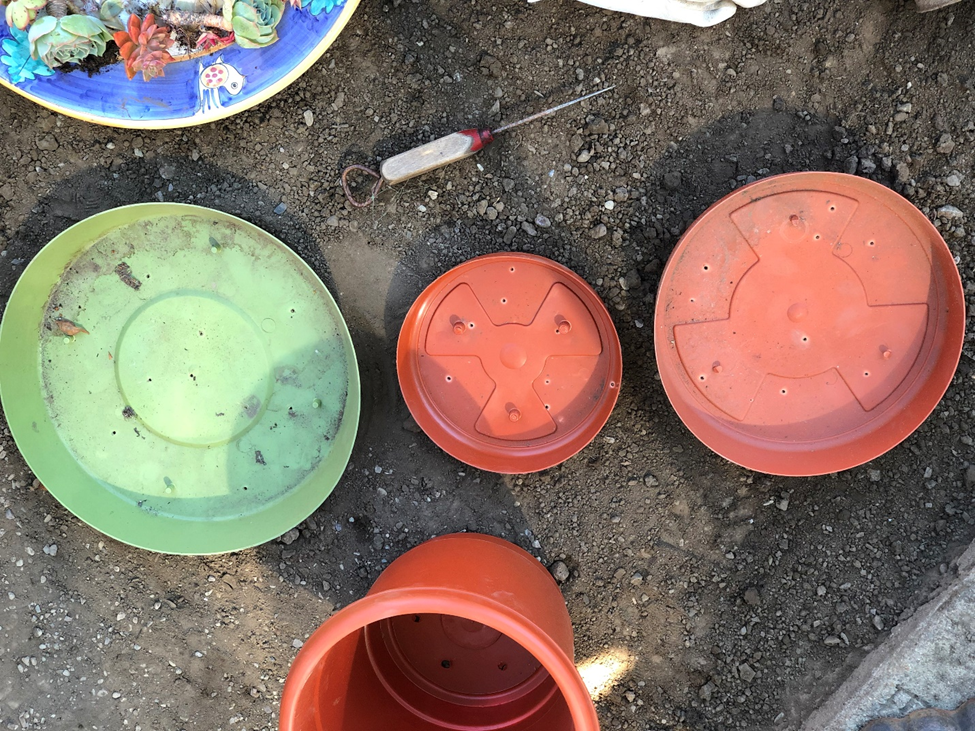
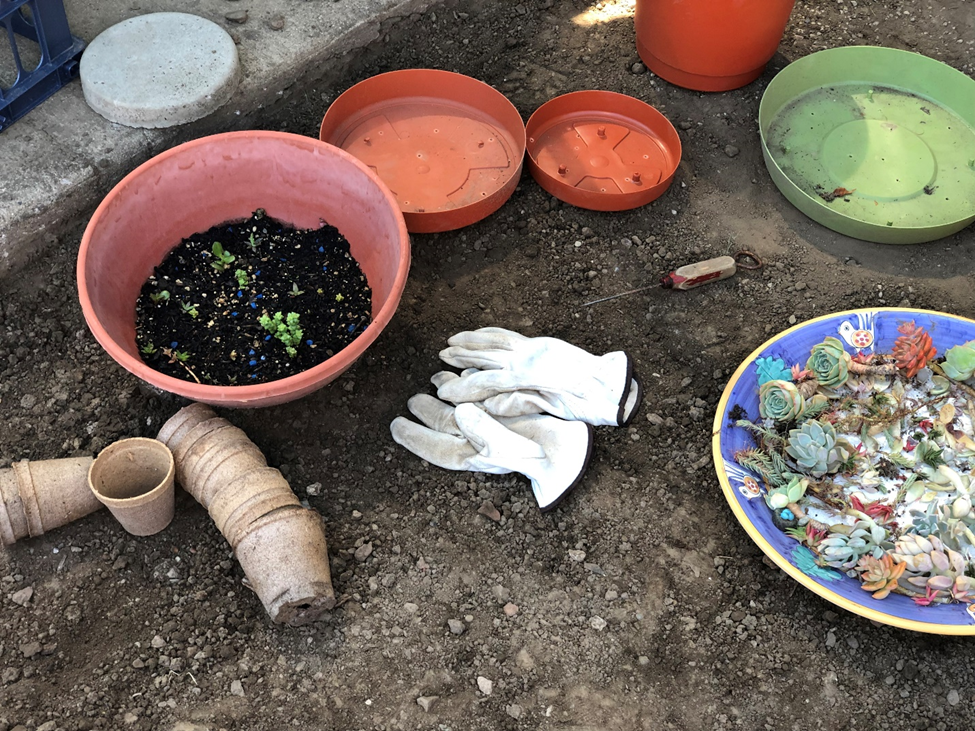
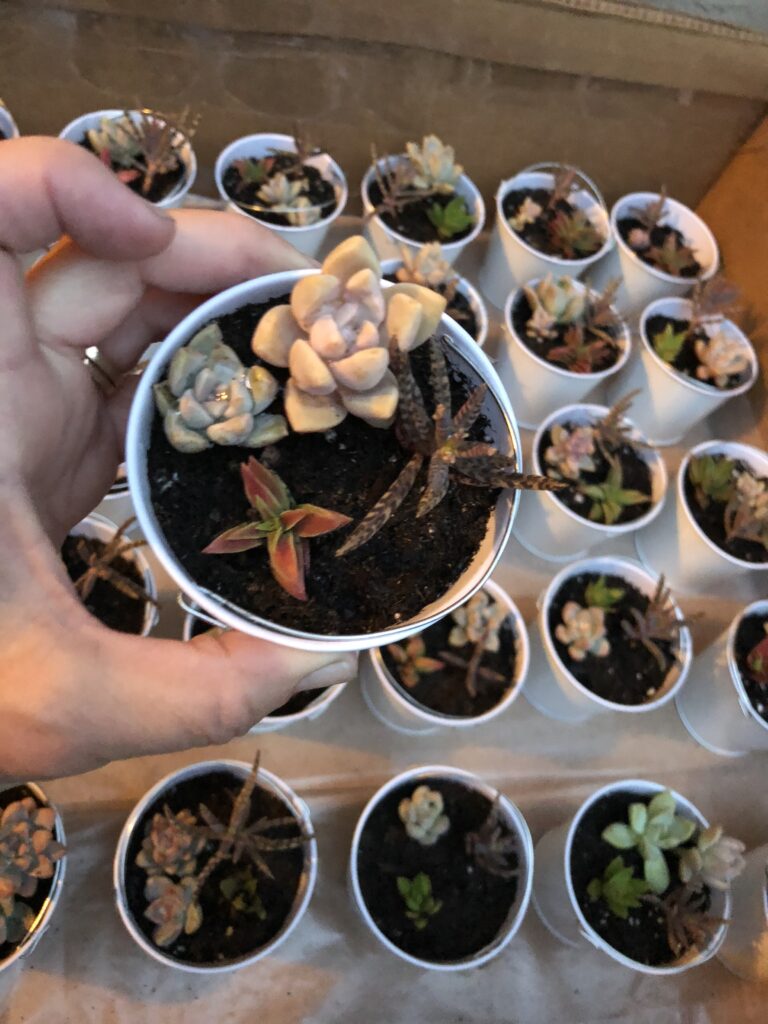
Here are some examples of the propagation saucers I’ve had over the years:

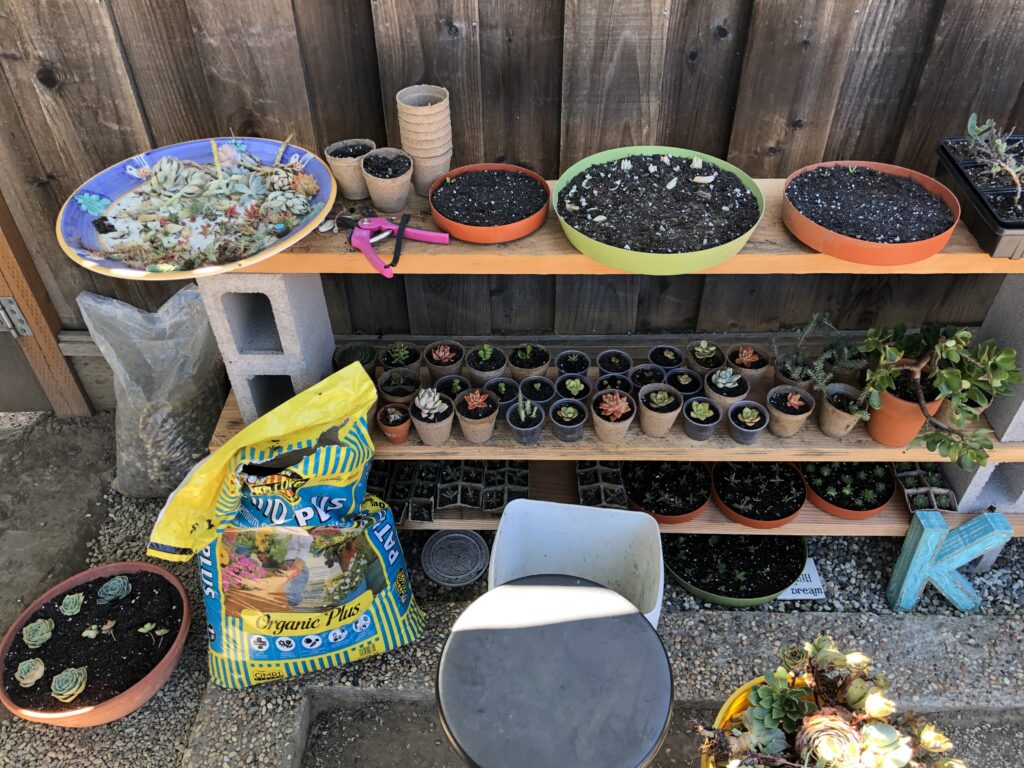
CARING FOR YOUR PROPAGATION POTS

FYI: these are all outdoor propagations

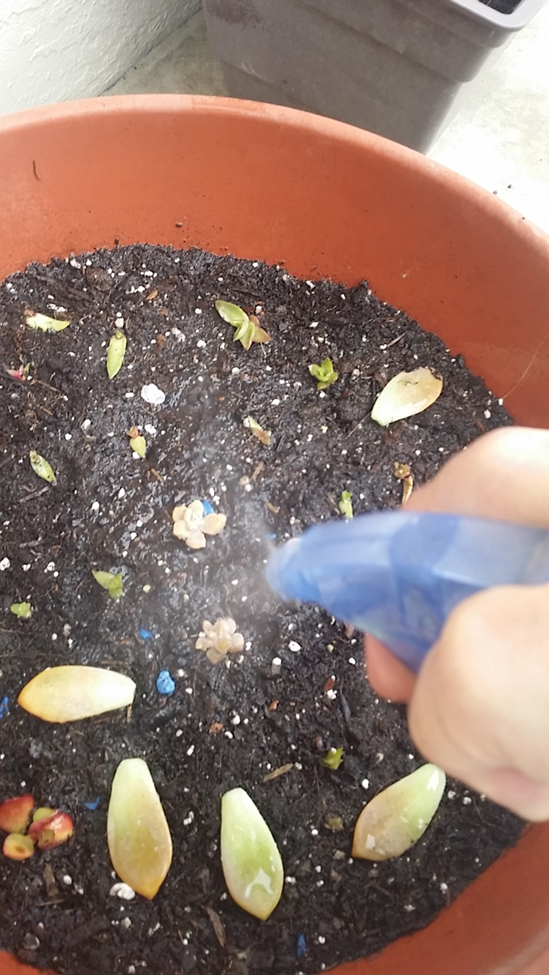
Remember, these new babies need to be cared for like babies, gently and with love😊.  For watering, it’s best to use a spray bottle if you have one.   If you don’t have one, you can use your cupped hand to apply the water, or a mist setting on the spray nozzle of your garden hose.  Water them thoroughly until the soil is completely saturated around the plants or leaf, and you see water coming out of the bottom of the saucer.  Do not water them again until the soil is completely dry.  Once they are rooted into the saucer you can use a light spray from your garden hose to water them.

The next important thing to know about caring for these babies is how much sun they will need.  Different varieties of succulents require different sunlight to survive and thrive, but all babies require the same care.  Until they get a strong root system, make sure they don’t get too much sun.  Place the saucers in a spot that will provide morning sun and afternoon shade.  Once they have some solid roots you can transfer them to a bigger pot, or to the ground.  Where you place these more mature plants will depend on the plant, and the amount of sunlight they require. 

I have already created tutorials on how to care for your plants, and one on a fun project you can do with your new plants! Here are the links, they will give you some things to think about and really help you care for your plants as they mature:

4 Things to Know about Plants

Miniature Potted Garden Project

10 Tips on How to Care for Your Keepsake Garden Project

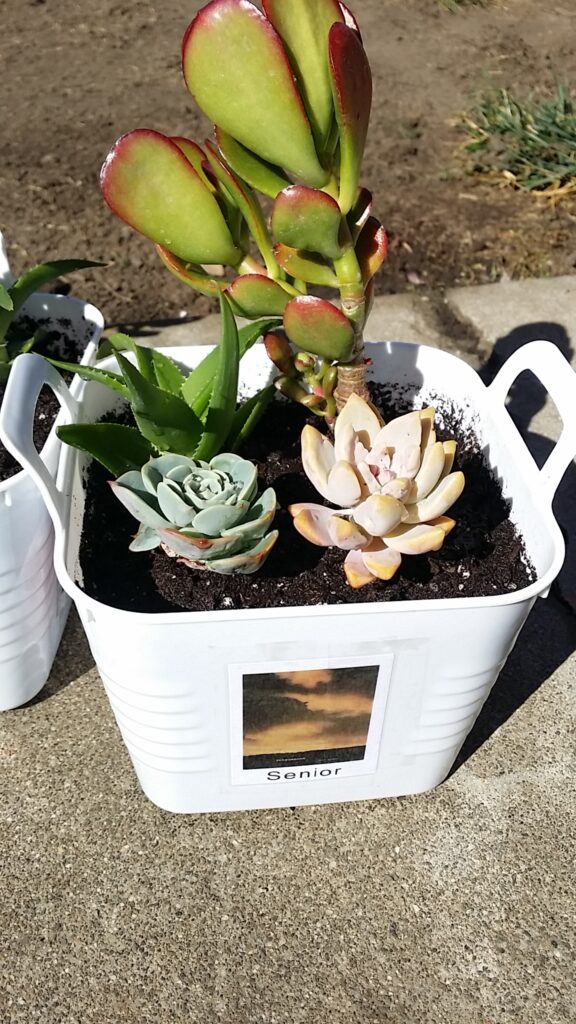
Keepsake Crafter Tip:  When I’m propagating, I like to mix and match a few varieties together into plastic pots for an interesting display.   Then, once their roots have started to grow and settle into the dirt, and they have grown comfortably together, I transfer them directly into the ground in my garden, or into a larger more decorative pot as a gift or for displaying.  This helps assure they will survive and thrive together in their new home, and they start off in the ground (or pot) already happy to have their friends with them.  Just keep in mind when you are mixing varieties together that they need to be able to survive in the same environment.  So, for example, don’t mix low-light plants with plants that require a lot of light. 

Do a little research on your succulents then, by trial and error, you will be rewarded beyond your imagination 😊.

Below are pictures and information on some of my favorite succulents.  Best of luck on your journey to owning and raising succulents.  It is a journey that has no end and is full of fascination, ups & downs, disappointment, gratification, love and passion.  Yes, all of those feelings are a part of gardening with succulents!

Here’s to a healthy, happy garden and gardener!

Keepsake Crafter

Crassula Capitella – Campfire Crassula

The Crassula Capitella was the first succulent I owned that showed me there were different ways these plants could reproduce themselves.  While pulling weeds one day I saw some new baby plants laying alongside the original plant.  I can’t explain it, but I felt a kind of joy and excitement that comes with learning something new.  Something new that you had never contemplated before about a subject you loved.  If you look closely at this photo you can see the new plants that have dropped away from its mother plant:

Aren’t they gorgeous?  This plant propagates by producing small plants on its stems.  Some will fall to the ground, but you can also pick off the buds and replant them in soil to propagate.  They also drop leaves that will grow roots, then a new plant will form.  Not all the leaves will produce a plant, but most will.  I gather them up, collecting them onto a plate and bring them over to my potting area:

Once I’m ready to plant them, if I don’t have a specific project I’m working on, I’ll just start to add them to whatever container I have to use. For this round of propagating, I used the large rectangular container pictured below.  I’ve found it to be a great container to propagate a large amount of the same plant all at once.  Then as I want to use them, I don’t have to search for that plant, but can go to the large container of them. I pull them out one at a time or as a bunch, and then reuse the space left behind for new babies as they are born 😊.

Pick off one bud at a time, make a small hole in the soil, place bud into indentation:

Look at the beautiful green color you’ll see in the most healthy plants, these plants change colors depending on the weather, the water and the sun they get. The pastel coloring actually is a sign of stress, but nothing to worry about.

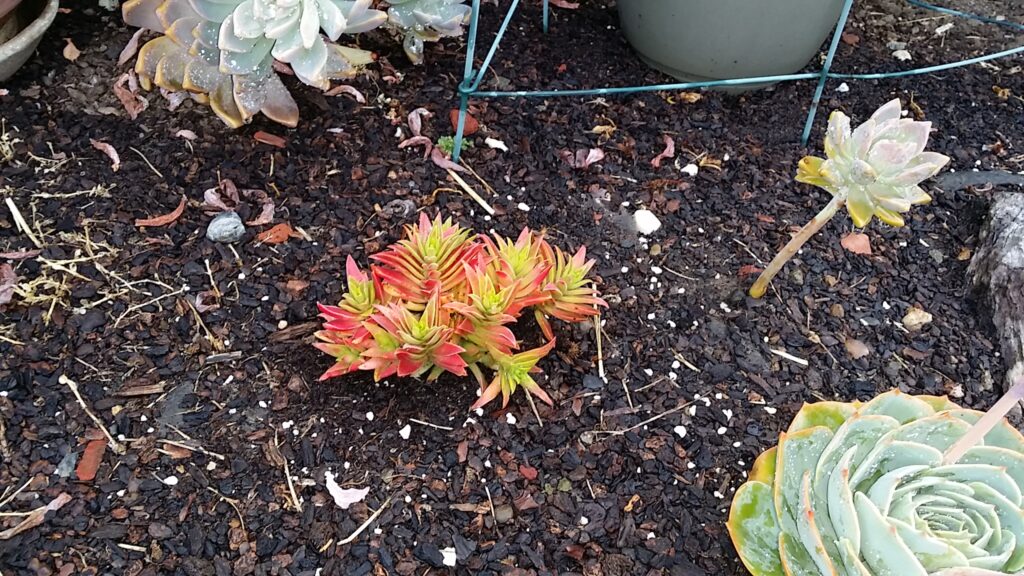
Graptosedum – California Sunset

This plant has grown (gardener pun intended 😊) to be one of my favorite succulents.  I have really enjoyed propagating these over the years and have found them to be an amazing ground cover.  They are a very hearty plant, and very easy to maintain. They can survive a lot of heat and a lot of cold. Although I haven’t grown them in snowy conditions, they’ve survived the low 30’s with no problems. (I’ll have to mail some to my son on the east coast and have him test how they grow in snow and icy conditions, update coming.) As for the heat they can sit in the direct late afternoon sun, but I haven’t tested out heat higher than 103 degrees Fahrenheit.

Most importantly for this topic, they are so easy to propagate!  Left to grow on their own in the ground, they will continue to propagate, and keep spreading out as far as the ground allows.  You can place them in pots, but they will try and grow out of the pot and onto the ground!  I think they just don’t want to be in that pot!! You will see what I mean in a picture below. There is a really pretty picture of a single flower hanging out of it’s pot.

One fun fact about this plant, you don’t even need to dig a hole and place it into the ground for it to survive and thrive! You can take a piece, lay it on some dirt and care for it like your other plants. Over time it will root into the ground and grow and grow and grow.

You will love the ever-changing colors and beauty of the plant throughout the year.  Each season gives it a new look.  Once they are planted, the only work needed is watering, weeding and cutting back the growth if it spreads to areas you don’t want it. Make sure to replant, replace and/or share any of the cut-back plants!

One crazy way to propagate this plant is by taking the leaves and fanning them out around your pot. Then caring for them and watching them grow over the next few months.

Grab a handful of the “leaves”. You can take one flower and pick each of the pedals off and place them around the propagation pot:

Use a spray bottle to water
They also love the rain!
Over time you will see roots at the base of the pedals that are going to become small plants
Here’s an example of what will happen if these babies get too much sun, they will die

Here is another day of propagation for this plant, trimming back the groundcover so it is behind the stone border, you’ll see how many babies were underneath the plant as I trimmed pieces off:

These trimmings and babies will go into a propagation pot, and then transferred to other parts of my garden, to friends in gifts and as trimmings to use in their garden. I love to share my plants with friends and family!

Look at the babies growing at the base of the long-stemmed older flowers as they grow. Propagation at its easiest!!

This plant puts out the most beautiful yellow flowers in the early summer months
Here you can see the blooms just starting

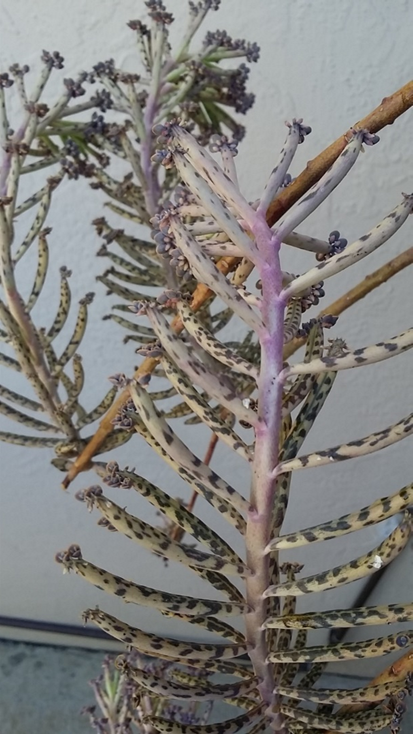
Kalanchoe Tubiflora – Mother of Millions – Chandelier Plant

This succulent is truly fascinating, and its nickname is perfect, because if left to grow unfettered she will have millions of babies!

How this plant Propagates: Look at the picture above. See all of the little flowerlike tips? Each one of those is a seed for a new plant, hence the nickname Mother of Millions. They will drop off around where the plant is placed and new plants will begin to grow all around it.

This is one of my favorite succulents not only because it’s so easy to grow, but because of the beautiful shape of the plant, the way it survives, blends in and thrives in any spot you put it. And of course because of the beautiful red-orange colored flowers it produces from late fall into early spring:

Here is how I propagate this plant, let’s start with a more mature picture of the plant shown above. Notice the long, thick stems that came out of the pot. This is another example of a plant growing out of it’s pot and looking for the ground to grow into. This plant grows great in a pot, but don’t be alarmed when it grows out, then downwards, then when it hits the ground grows back upright. To me this is so cool and was so unexpected.

You can see that each off those off-shoots that are on the ground are now growing upwards and each stem has grown several plants over time.

In this next example I clipped away a full stem as close as I could to the original plant and separated each individual plant. As you can see they already have a good root system started!

Then I replanted them into small pots to grow together:

If you look closely, you can see I added a few small babies into 2 of the pots

Keepsake Crafter Tip: I like to use plastic pots for propagating, because when you go to repot the plants it is so much easier to remove a plant from a plastic pot than from ceramic or clay pot. This is because the plastic is flexible, and you can loosen the dirt in a way you can’t with a hard pot. When the soil is completely dry in the pot, place your hands on opposite sides of the pot and gently push the pot inward towards the soil. Do this around the whole pot and you will see the plant start to come away and loosen from the pot. You should now be able to slide the whole plant out of the pot. If the plant is rootbound, though, meaning the plant has outgrown the pot and the roots have formed into a tangled mess at the bottom of the pot, some of the roots may be growing out of the holes in the bottom stopping you from getting the plant all the way out. You can just cut those roots away underneath the pot and the plant will now come out of its old home and is ready for a new one!

When you’re done planting these new teens (I wouldn’t call them babies, this offshoot was at least 2 years old) water them gently:

You can see they are starting to settle nicely into their new homes
Look how cute the Mother of Million babies are 😊! I can see at least 50 babies, can you?

Sempervivums – Reinhard (hens and chicks)

Here is another favorite succulent in my garden, Sempervivums! This plant is frost-resistant because they are native to colder regions like Europe. They are so easy grow and the colors are beautiful. This plant propagates by producing multiple babies each year that shoot out away from the mother plant on a long stem. There will be several babies from each mother plant.

In this propagation I took the Sempervivums that I had placed as babies into one of my rectangular plastic containers:

You can see the babies shooting off and replanting themselves into the soil
This picture is 4 months later

And here they are a year and a half later! Crazy how fast time flies by. Look how beautiful the purple-colored tips are:

This is how easy they are to propagate, a little time and patience and look you have 13 new plants! Let’s replant these Sempervivums!

I replanted these individually into some peat pots I bought at Home Depot (my favorite store 😊). I really don’t like using the peat pots as much as other containers, but they worked great for this round. I like using propagation pots that I can use over and over again, and peat pots don’t work well for that. They are better used as vegetable or flower seed-starter pots that will be planted directly into the ground.

One at a time I gently dug my fingers in the dirt around the plant and slowly pulled the plant out. The roots don’t grow really deep with this plant so it’s easy to grab them and pull them out. The roots are not intertangled with the other plants roots.

Before replanting I pull off the dead leaves around the bottom of the plant.

Over time you will see the new babies shooting out! The babies are ready for more propagations, or you can replant this more mature plant with the babies attached. Here I took these baby shoots and planted them into the rectangular peat pots:

Trim off the stem, and place into peat pot
Here is this propagation 3 months later. The tiny babies in the rectangular peat pots have grown quite a bit and are looking strong and happy
And here is this propagation 10 months later. Look at all of the new babies that were born!!
Notice the root system on these hanging babies

And, last, but certainly not least, you can make some cute arrangements with these babies!!!

Here are some cute party favors I made for a friend
Centerpiece for a graduation party
Another set of cute party favors made for a friend’s baby shower

I got comments online from some snobby people that thought you should only grow succulents with seeds!! I have no idea the common sense on that comment, and now neither do you when you see how easily succulents propagate and no seeds are needed.

I hope you enjoyed this tutorial and are motivated to start doing some propagation yourself!!

Kindest regards,

Keepsake Crafter